Cisco ACI Fabric - APIC Day 1 configuration

This time I will go through configuration steps for provisioning switches on Cisco ACI Fabric, NTP, DNS and BGP Route Reflectors. Steps described in this post are applicable for Cisco ACI Fabric and Cisco ACI simulator.
0. In your favorite browser address bar add https://oob.ip.address. Use IP address what you set during APIC initial configuration.

Cisco ACI Fabric APIC ver 5.2 supported browsers:
- Chrome version 59 (at minimum)
- Firefox version 54 (at minimum)
- Internet Explorer version 11 (at minimum)
- Safari version 10 (at minimum)
1. After what you will login it will appear Cisco APIC welcome screen, looks nice. Just press Let’s go as this white button suggesting.

2. One more screen from APIC this one is important as it will provided you information about:
- New features for installed APIC version of APIC.
- Updated scalability numbers.
- Very good resources and knowledge base for ACI fabric and APIC clusters.
After what you reviewed all interesting things pres Start ACI Fabric Setup button.

3. Below we can see the most important sections which should be configured before any service configuration on ACI.
I would like to suggest following order:
- Add leaf and spine to Cisco ACI Fabric.
- NTP server configuration.
- DNS server configuration.
- BGP RR configuration for Spine.

4. Add first leaf to Cisco ACI Fabric, for serial number we will use TEP-1-102, 101 and 103 as this is Cisco ACI simulator on real Cisco ACI Fabric you will have serial numbers in following format F1234A768. For node ID choose unique number, once when you tied node ID to serial number you will not be able to change on the fly. If you would like to change you will need to do decommissioning and commissioning with new node ID. Switch name you can change anytime if you will not like assigned during initial switch provisioning.

5. Here you should pay attention and check is it switch in Registering phase, if you notice some other messages please stop and perform tshoot.

6. Once when is done we should see that switch is successfully Register as we can see below for leaf with node ID 101.

7. Same you should repeat for all Spine switches too, below you can see Registering of spine with node ID 103.

8. And Spine with node ID 103 has been successfully Register.

9. Based on workflow from point #3 I will proceed with NTP configuration. You can choose time format from local or utc. Use plus sign for adding one or more NTP servers, one of them you can set like preferable.

10. In the lab for NTP server I use public Google NTP server just for test.

11. Here I will add Google DNS server just for test. Usually you will use internal DNS. Don’t forget to add DNS records for leaf, spines and APICs.

12. Here we can check status about what we done already. Below you can notice that still we have to configure BGP route reflectors. To configure BGP just press button Begin which will redirect you to configuration page.

13. Press plus sign and add minimu two spines per Cisco ACI fabric site.

14. From drop down choose node id of your spine. As I am using Cisco ACI Simulator I have only one spine with node ID 103. For test I am using default AS number.

15. Below you can see that spine with node ID 103 was successful registered like RR in Pod 1.

16. Short overview all looks good as Proxy won’t be used.

17. Summary page, last step for configuration setup.

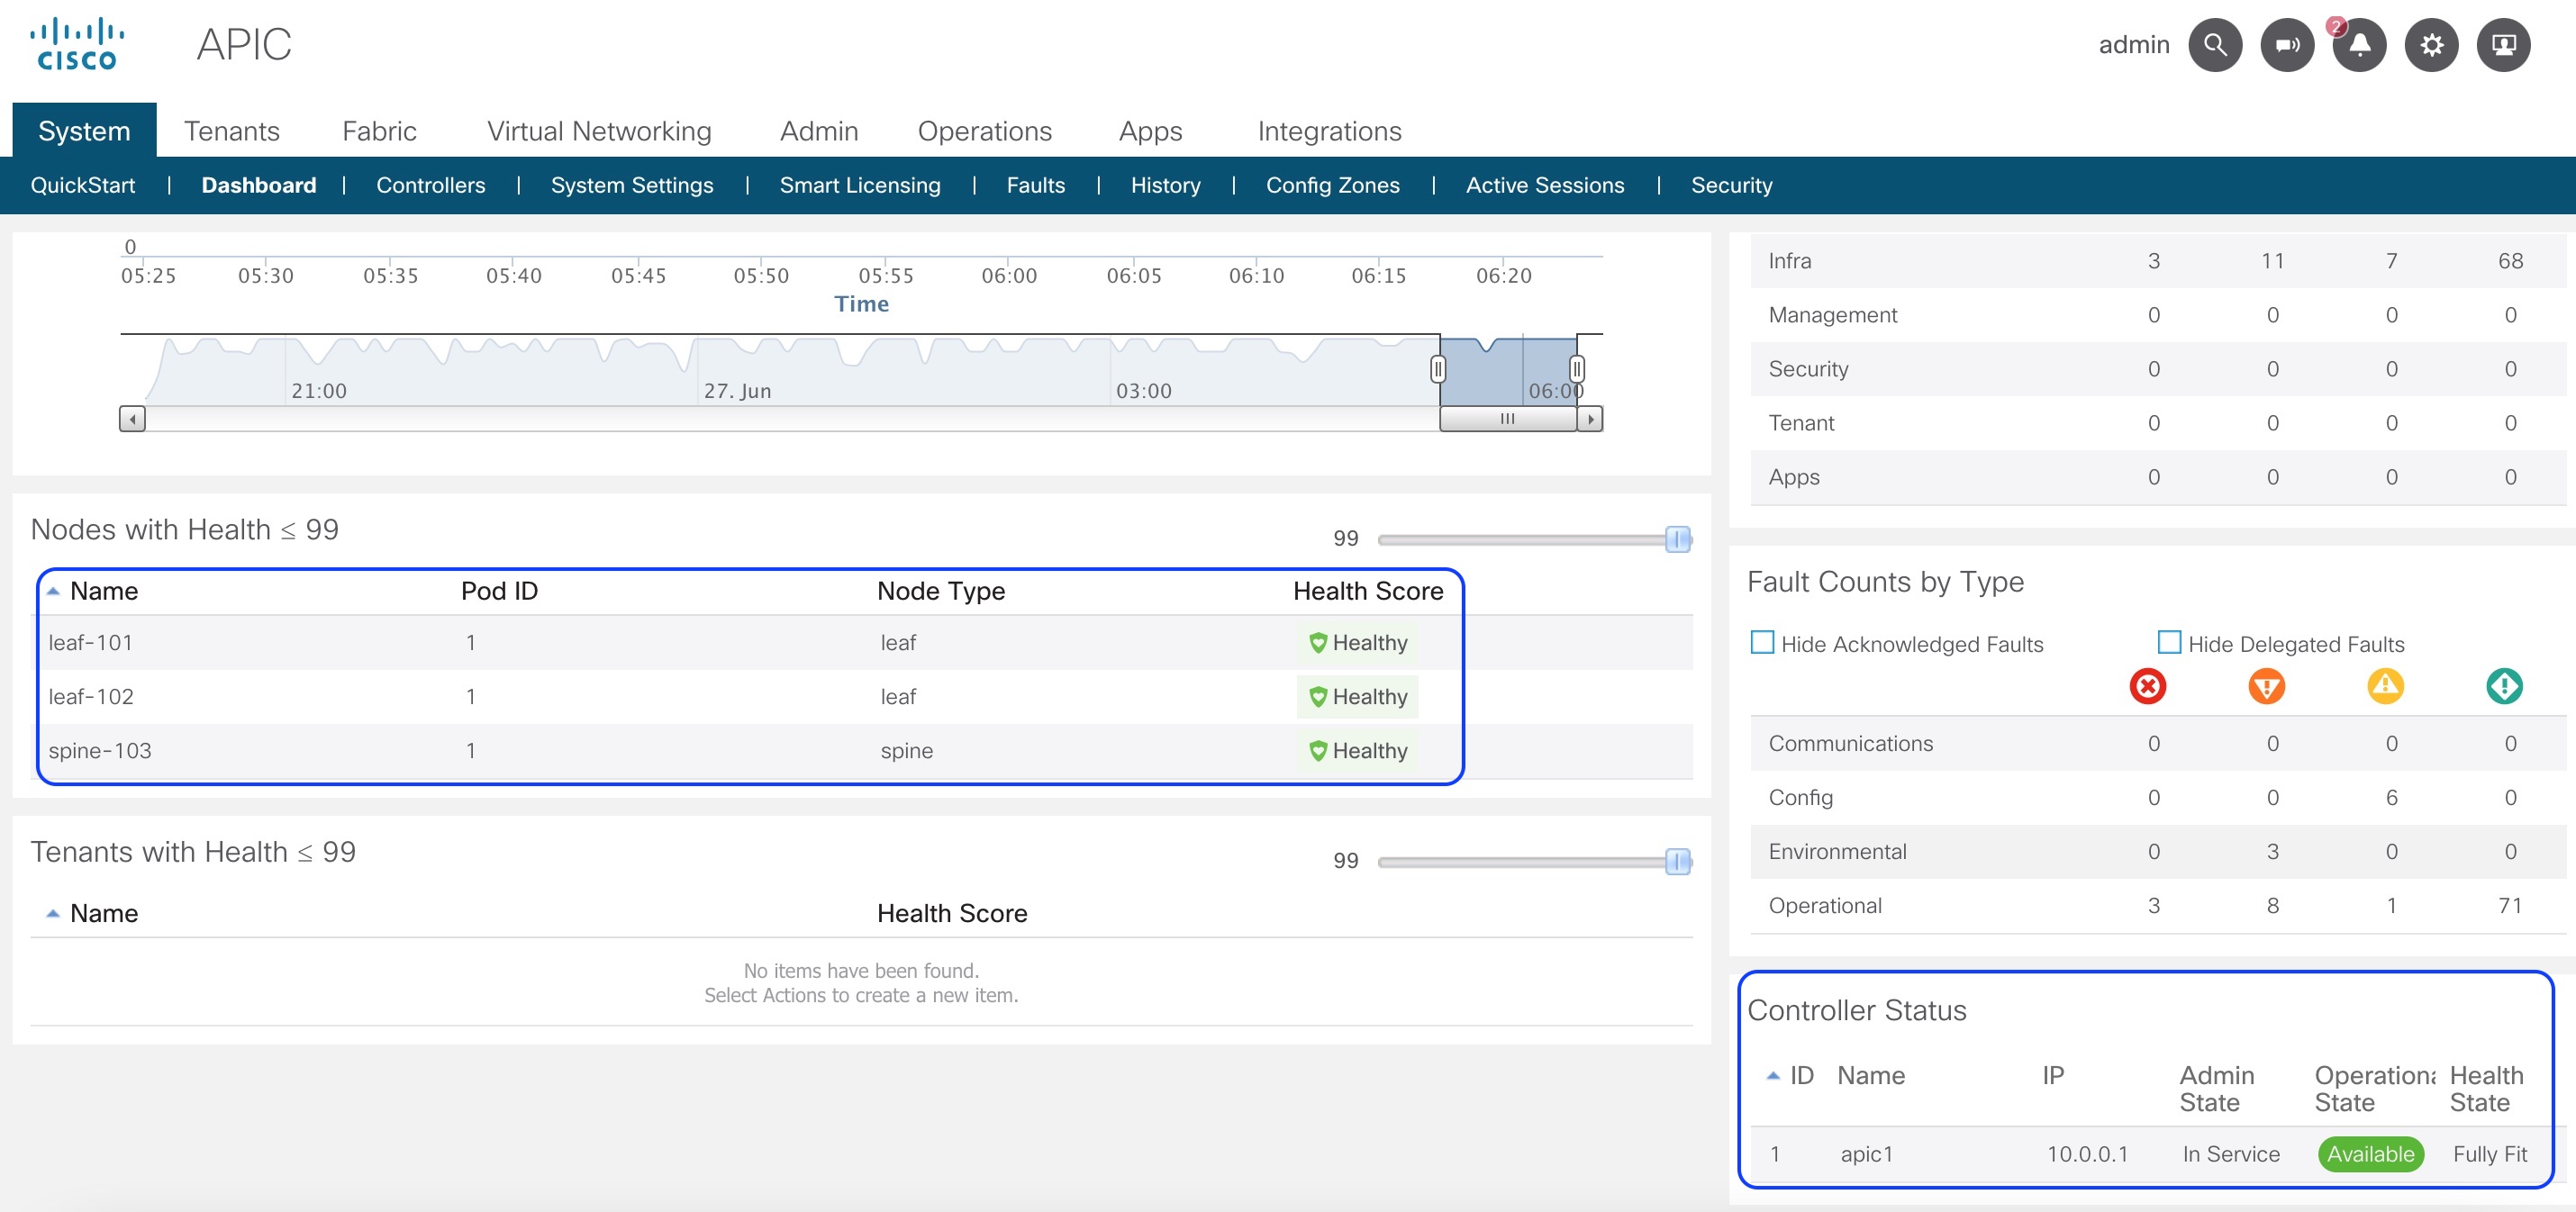
18. I would like to recommend you to check Dashboard sections like below on print screen
- Switches should be Healthy.
- Controllers should be In service and FullyFit.
Note
This is only zero day configuration for Cisco APIC. For MultiPod, Multisite,
Remote Leaf and other Cisco ACI Fabric designs should be configured other parameters
and network objects.
Bonus steps for those how like to have clean ACI fabric without lot of system notifications.
Next few steps will describe how we can disable messages from Cisco Smart Software Manage, this is mostly applicable for lab deployments and ACI Simulator as after 90 days should be reconfigured.
19. From APIC notification center please choose Cisco Smart Software Manager (CSSM).

20. Press on fault notification F3057.

21. As below on print screen click on Configure Network Settings.

22. From drop down menu choose Offline click on OK and you are ready.

I have walked through most important parameters for Cisco ACI Fabric. Now you can start to play with Cisco ACI Fabric network objects or you can proceed with fine tunning for the production environment. 😎