Five easy steps to configure static VxLAN Part 2

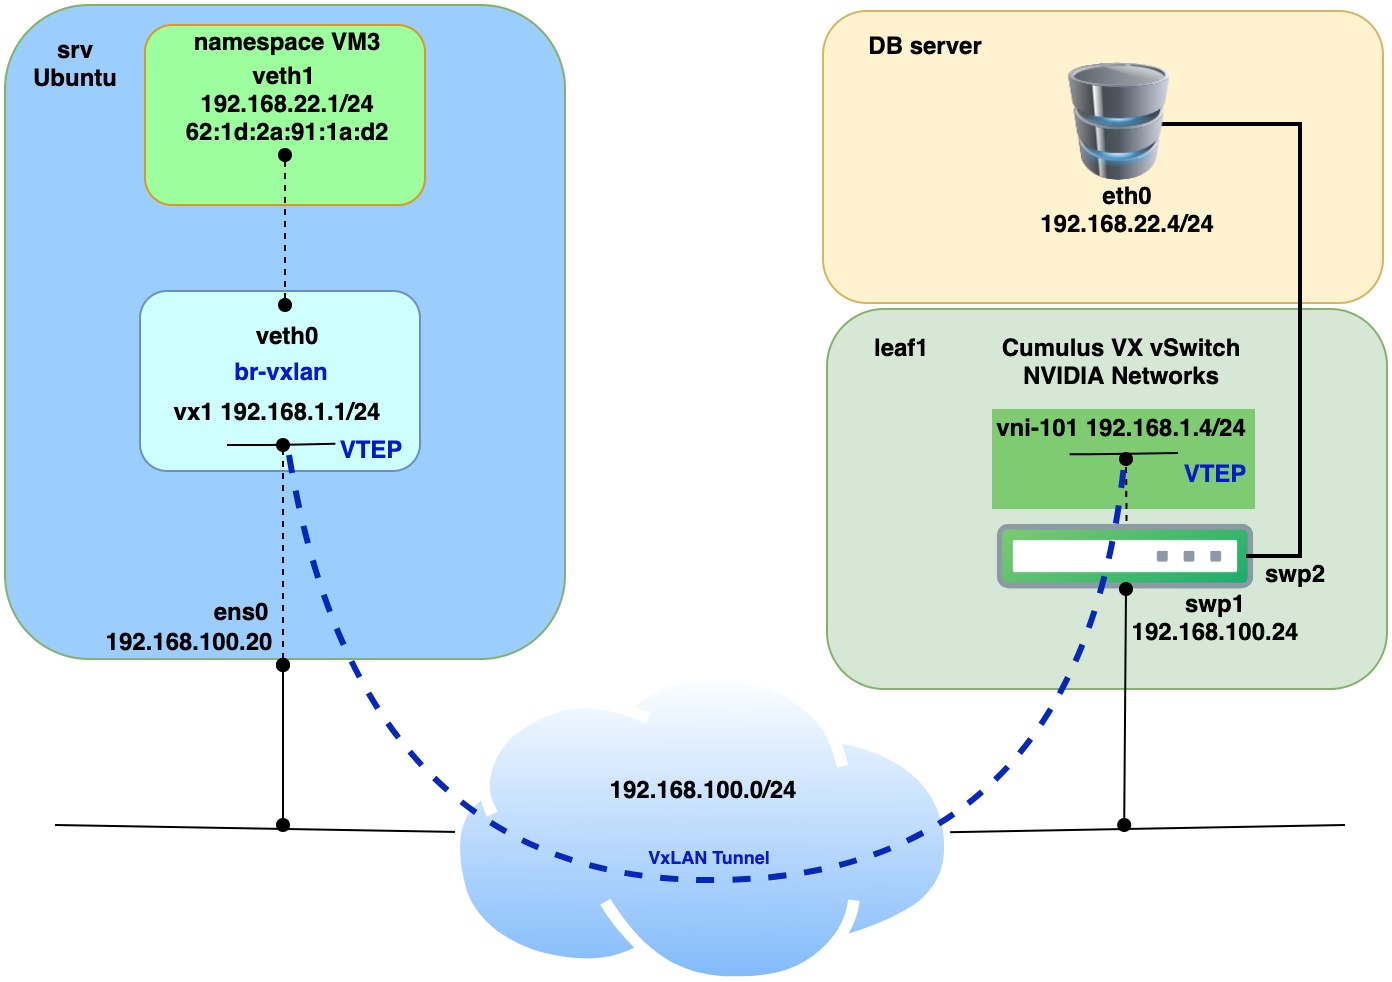
In Part 2 will be covered the case when we have physical DB server connected to network via L2/L3 switch and it should communicate with application running inside virtual machine. Nvidia Cumulus VX virtual switch will play the role of L2/L3 switch. On Cumulus virtual switch VxLAN tunnel be terminated from remote server.
To download Nvidia Cumulus VX virtual switch first you need to register. The procedure is very friendly and corporate email address is not required. Nvidia didn't limit bandwidth or some features of virtual switch. Cumulus Linux VX (virtual switch) does not require any license, which is really great for labs, PoC and tests. Click here to download Nvidia Cumulus VX virtual switch DB server will be simulated with VPCS (Virtual PC Simulator). VPCS is actually application with few command line utilities such as ping, ip interface configuration etc. It can be run on Linux or Windows OS. Instructions on how to use and run VPCS you can find on the following link click here. Like in Part 1, physical server with VMs will be deployed as virtual machine on baremetal KVM host and will be represented as "srv". Nested VM (application) will be simulated with Linux network namespace. Details on how everything is interconnected you can find below on the network diagram.

Prerequisites for servers (virtual machines):
| VM name | OS Version | Extra installed SW |
|---|---|---|
| srv | Ubuntu 20.04 | bridge-utils |
| switch | Cumulus Linux 4.4.1 VX (Nvidia) |
Step 1. Run VMs and install bridge-utils
Let’s assume that virtual machine “srv” (Ubuntu), Cumulus VX vSwitch and VPCS are successfully deployed on KVM host.
Bridge-utils were installed on Ubuntu virtual machine using the command below:
apt install bridge-utils
version of bridge-utils we can check from CLI from srv and srv1 with the following command:
apt list | grep bridge-utils
output should be
bridge-utils/focal,now 1.6-2ubuntu1 amd64 [installed]
version can vary.
Step 2. Initial configuration of Linux srv and Nvidia Cumulus VX virtual switch
Apply configuration on srv
Creation of namespaces.
ip netns add vm3
Creation of bridges on host srv.
ip link add br-vxlan type bridge
ip link set br-vxlan up
ip link set mtu 9000 dev br-vxlan
Disable spanning-tree on the bridges
brctl stp br-vxlan off
Creation of veth interfaces on host srv.
ip link add veth0 type veth peer veth1
ip link set up veth0
ip link set veth0 master br-vxlan
Adding IP address on veth1 and bring interface up
ip netns exec vm3 ip a a 192.168.22.1/24 dev veth1
ip netns exec vm3 ip link set up veth1
Configure Cumulus VX virtual switch.
When you connect for the first time to Cumulus VX console it will request you to change default password.
user: cumulus
pass: cumulus

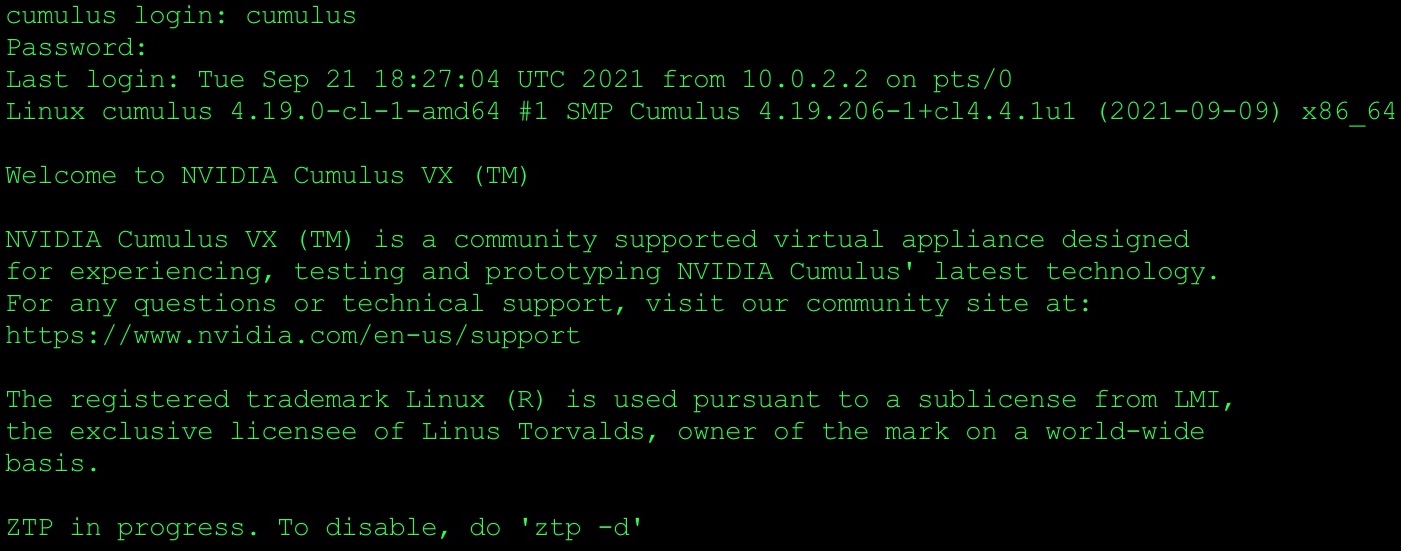
When you log in for the first time on Cumulus VX virtual switch, you will need to stop ZTP - zero touch provisioning process. Please check below:

Set hostname of Cumulus Linux virtual switch.
net add hostname leaf1
Configure L3 interface for connection with underlay network.
net add interface swp1 ip address 192.168.100.24/24
Configuration of Loopback interface, which will be used for VTEP termination point.
net add loopback lo ip address 192.168.1.4/32
Add swp2 interface to VLAN 101.
net add interface swp2 bridge access 101
Create bridge VLAN aware (Recommended by Cumulus network team).
net add bridge bridge vlan-aware
Add port swp2 to bridge.
net add bridge bridge ports swp2
Configure bridge VLAN id.
net add bridge bridge vids 101
Step 3. Configuration of VxLAN Tunnel
Apply on srv.
Create VxLAN tunnel interface with VNI 101.
ip link add vx1 type vxlan id 101 local 192.168.100.20 remote 192.168.1.4 dev ens0 dstport 4789
Bring up tunnel interface.
ip link set vx1 up
Add VxLAN tunnel interface to specific bridge.
ip link set vx1 master br-vxlan
Apply on Cumulus Linux virtual switch.
Create VxLAN tunnel interface with VNI 101.
net add vxlan vni-101 vxlan id 101
Allow VLAN id 101 for vni-101 interface.
net add vxlan vni-101 bridge access 101
BPDU guard and port BPDU filter will be added automatically.
net add vxlan vni-101 stp bpduguard
net add vxlan vni-101 stp portbpdufilter
Configure local VTEP, local Loopback0.
net add vxlan vni-101 vxlan local-tunnelip 192.168.1.4
Configure remote VTEP, IP address of remote server.
net add vxlan vni-101 vxlan remoteip 192.168.100.20
Add VxLAN interface to the bridge.
net add bridge bridge ports vni-101
Step 4. Add static MAC record to forwarding database
Apply on srv.
bridge fdb append 00:00:00:00:00:00 dev vx0 dst 192.168.1.4
This step we can skip on Cumulus Linux virtual switch as it will be applied automatically.
Step 5. Connectivity check
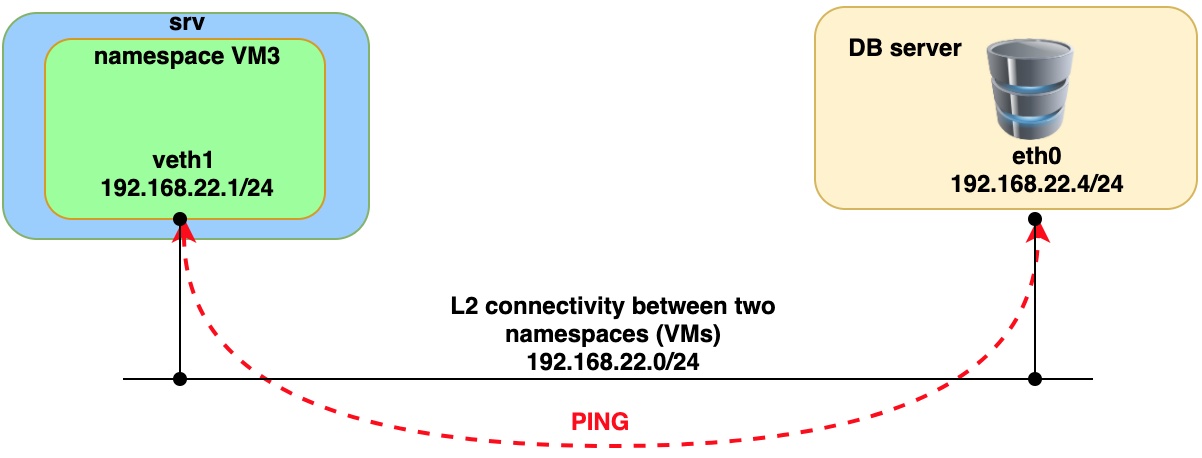
Run PING command from both side (namespace VM3 and VPCS DB server).

Issue ping from VM3 (namespace)
sudo ip netns exec vm3 ping 192.168.22.4 -- > remote IP on DB server.
Issue ping from DB server (VPCS)

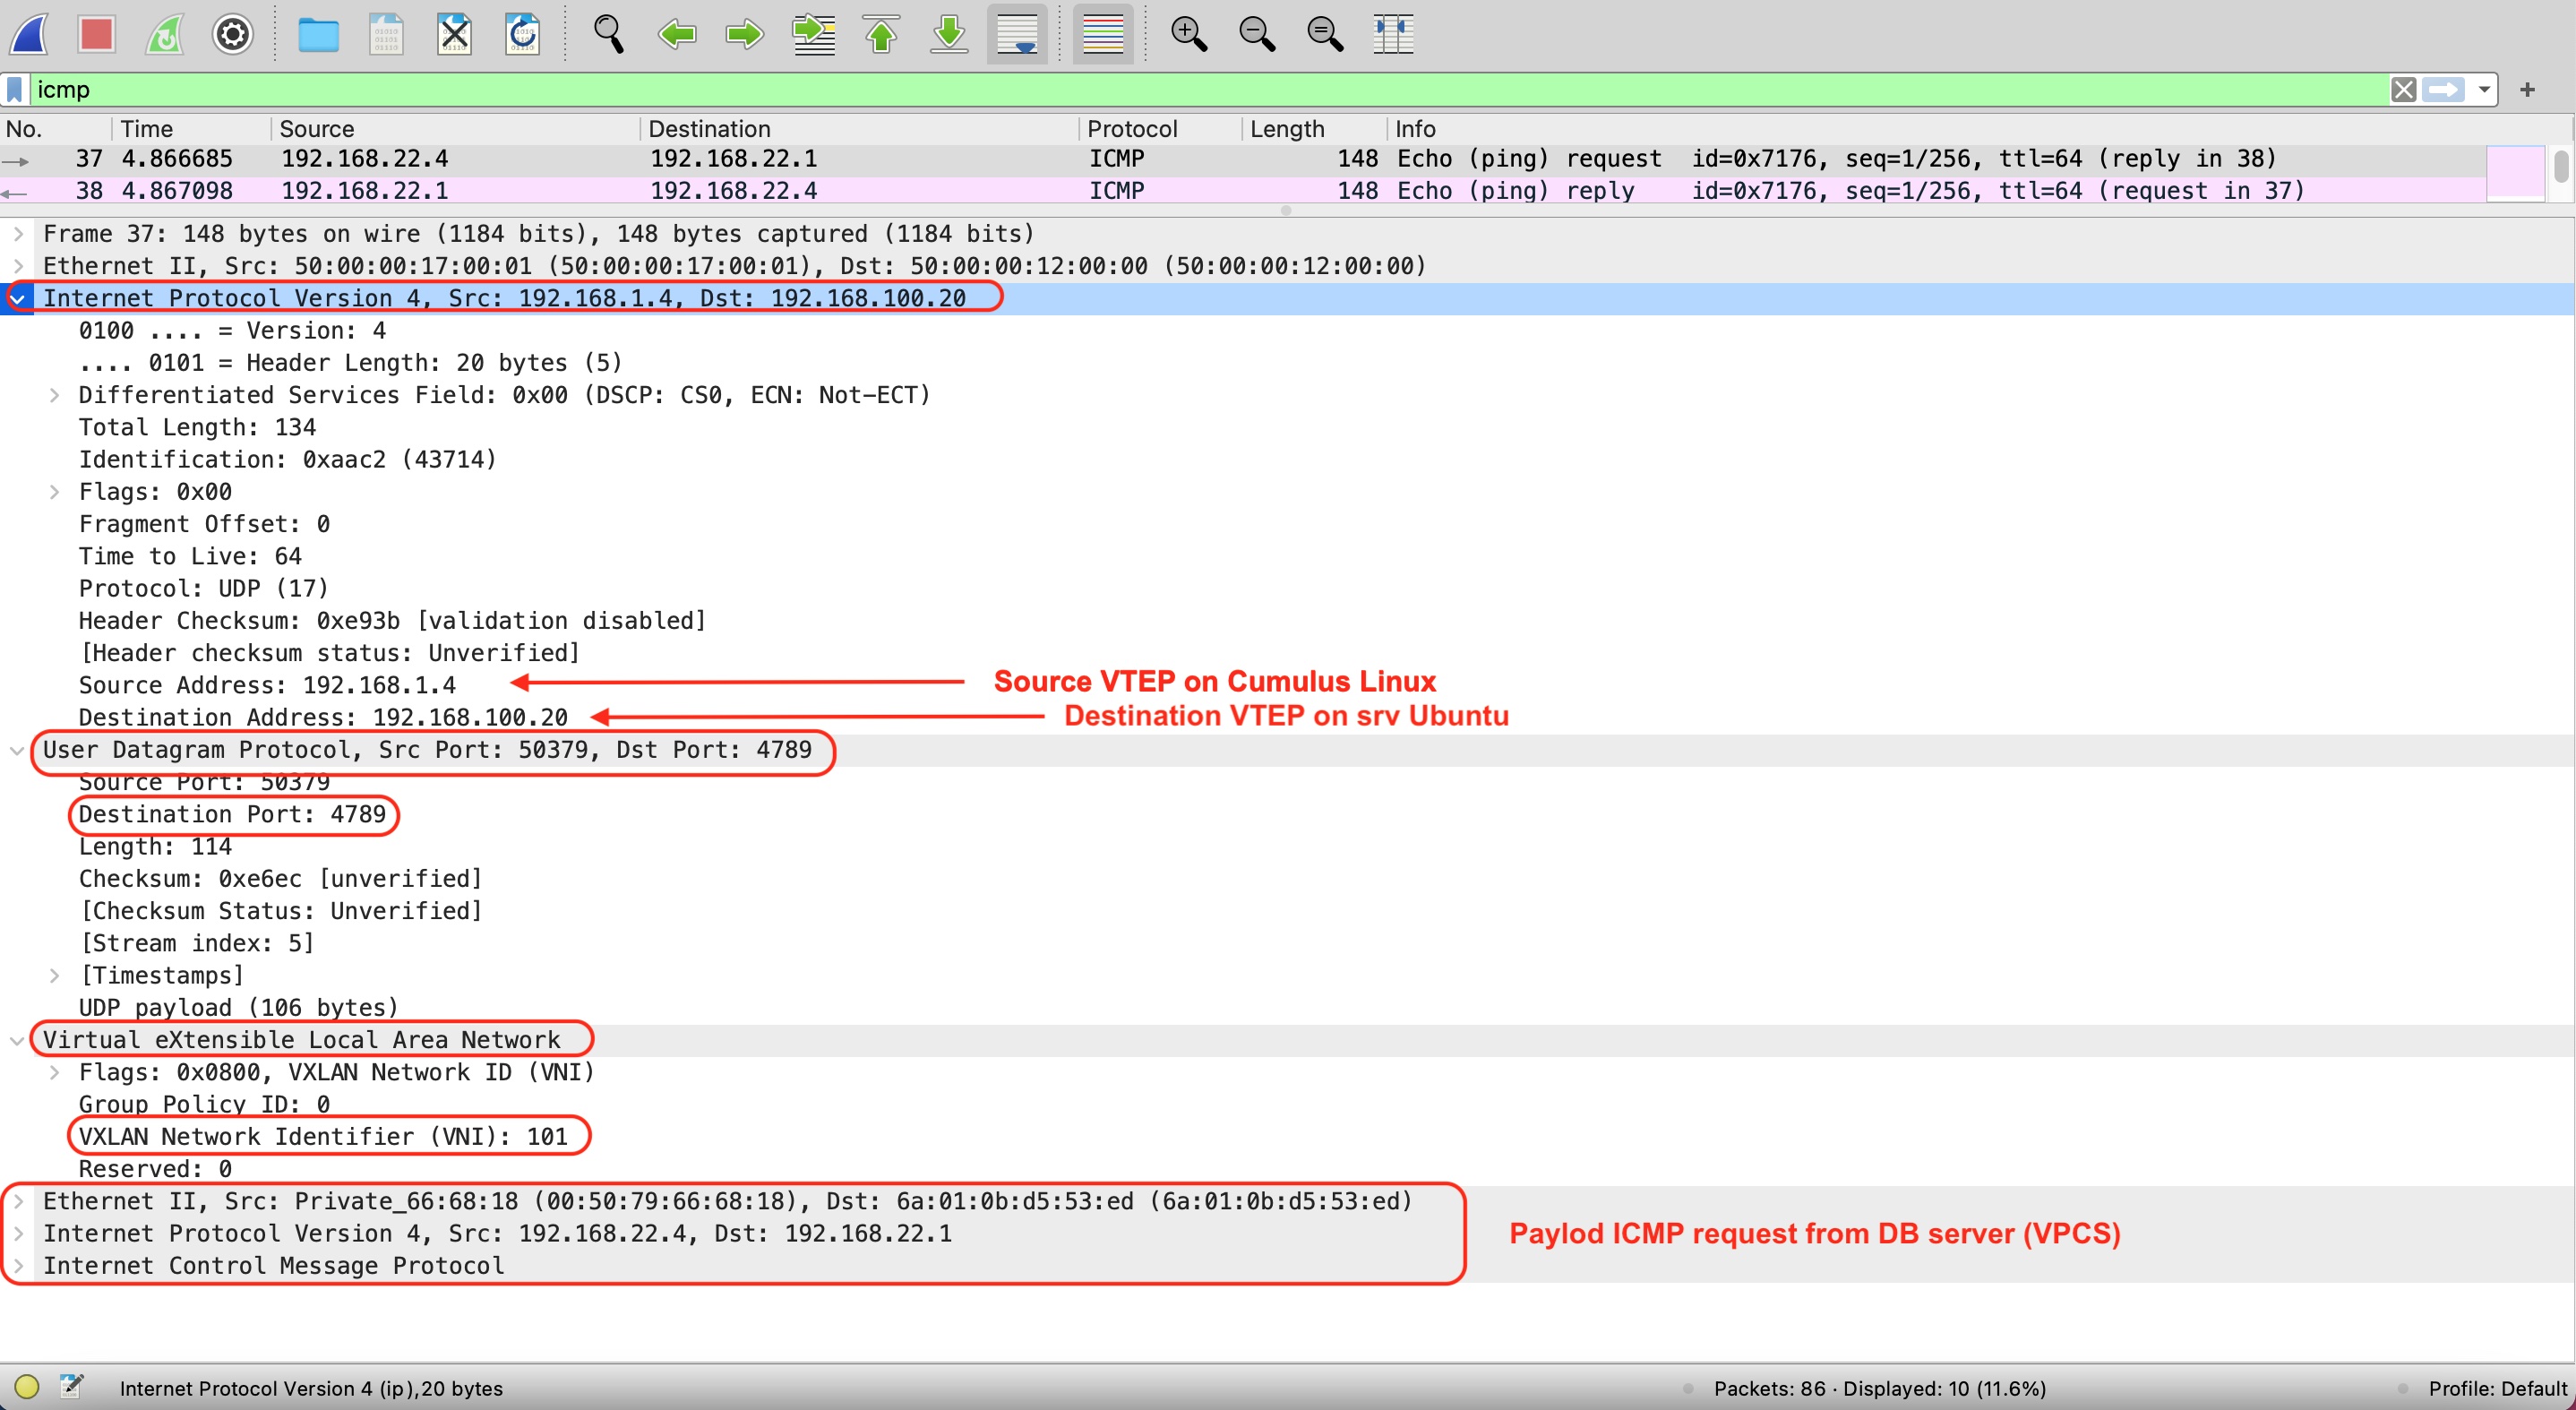
So, let’s check packet capture:

Part 1 Static VxLAN between Ubuntu hosts
Part 3 Static VxLAN between Ubuntu Hosts and Cumulus VX vSwitch DC Gateway
Part 4 Static VxLAN Data Center Interconnect